Set up AWS Route53
Route 53 helps us configure domain names to point to the website deployed on AWS, making access more convenient.
In this section, we need to prepare a domain name. The domain name to be used with the Hosted Zone on Route 53 only needs to be validly registered and have DNS management rights. I am using a domain borrowed from a friend, nguyenthanhhuy.id.vn. You can also register a free .id.vn domain from domain service providers like matbao, tenten, etc.
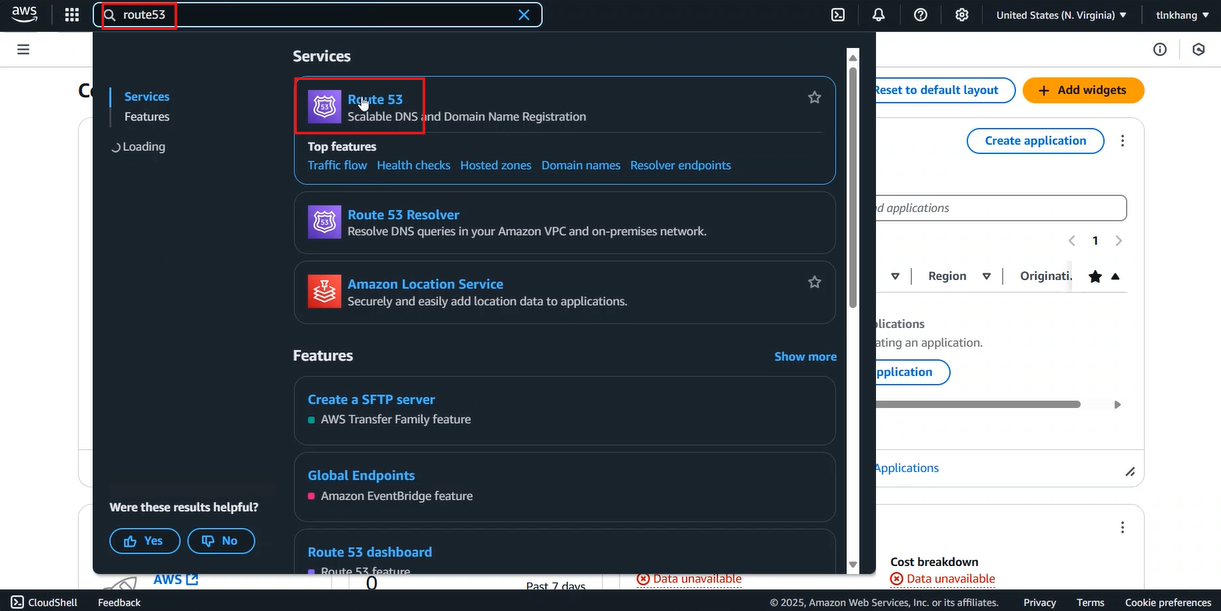
- Go to AWS Management Console
- Find Route 53
- Select Route 53
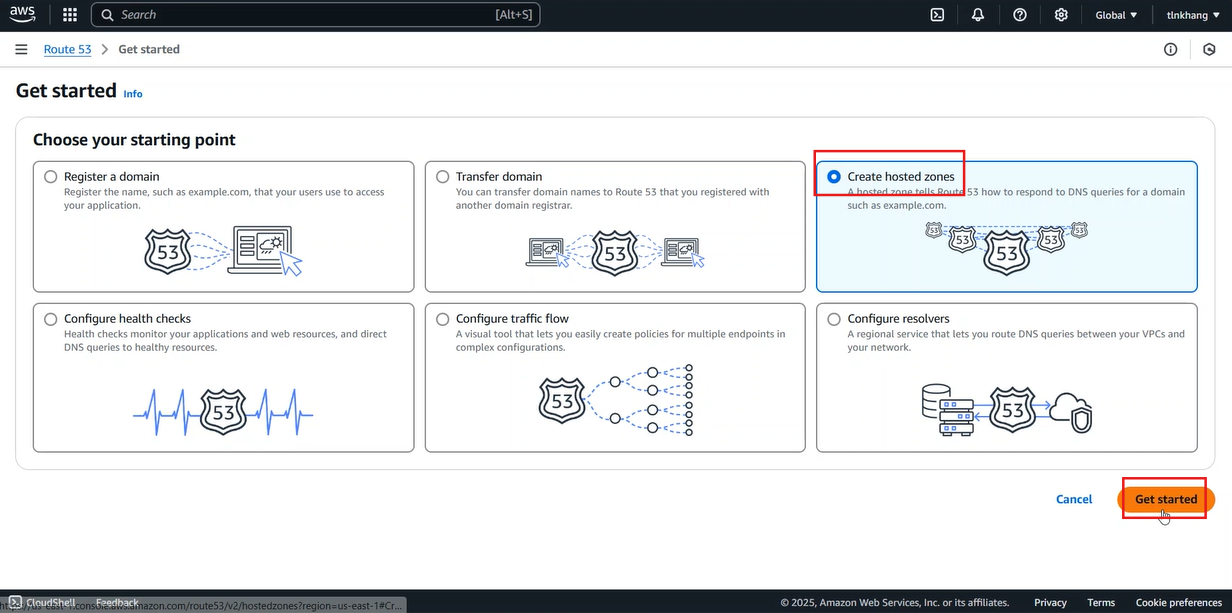
- In the Route 53 interface, select Started
- Select Create hosted zones
- Select Get started
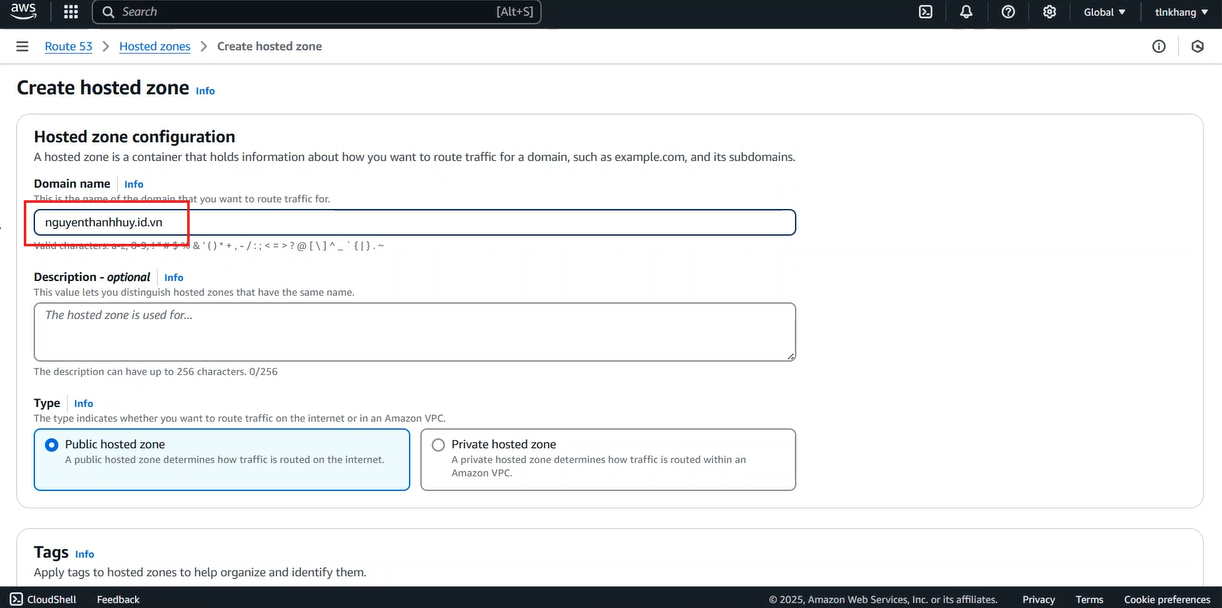
- In the Create Hosted Zone interface
- Enter Domain name as your domain name
- Scroll to the bottom of the page, select Create hosted zone
- After creating the Hosted zone, access the newly created hosted zone
- In the Record section, copy the values in the Value/Route traffic field
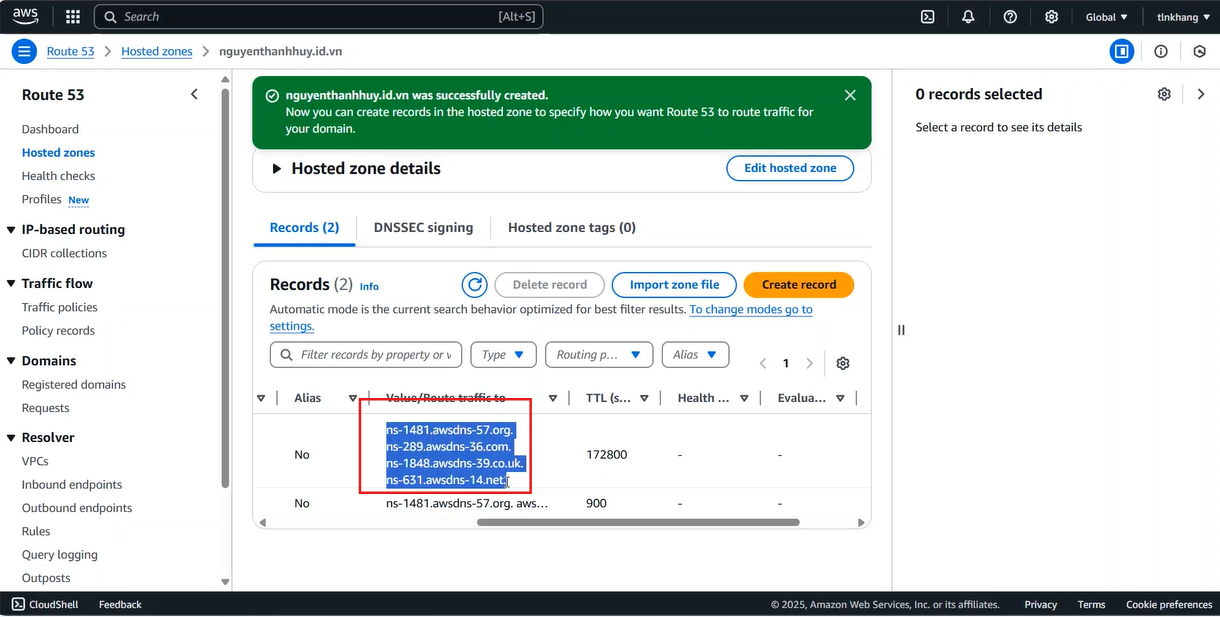
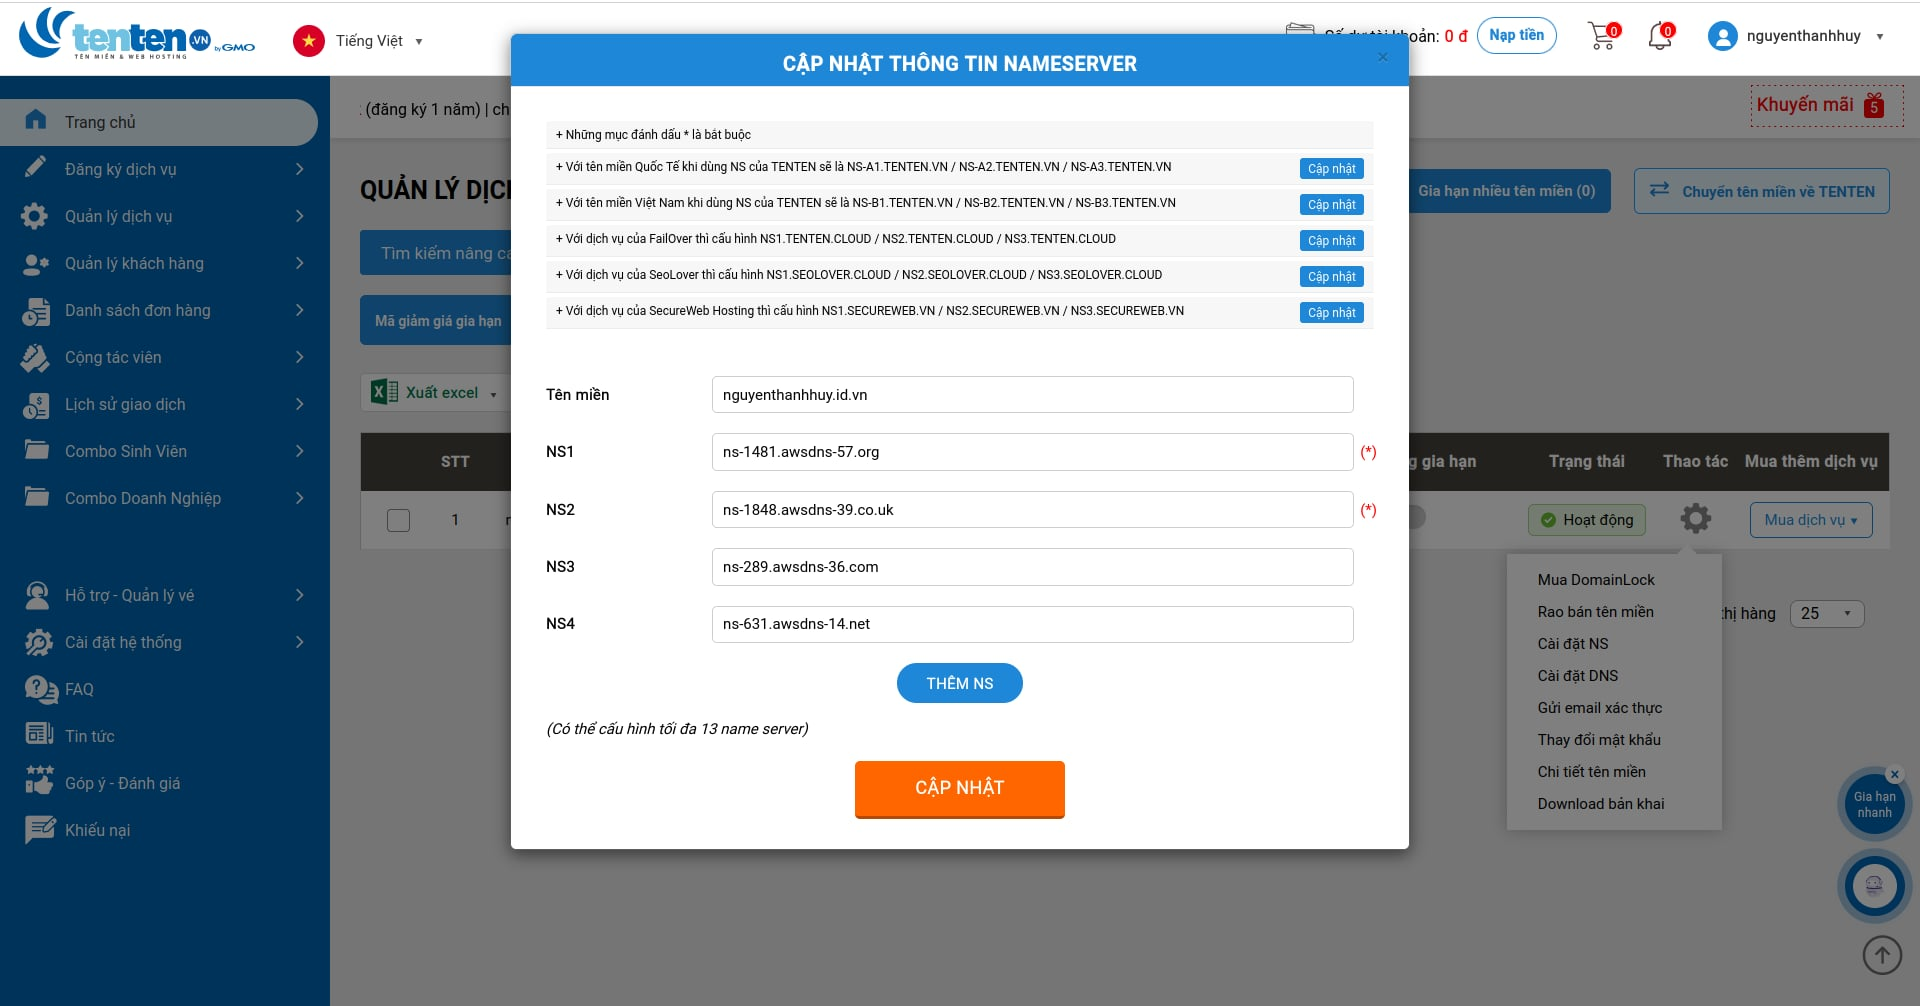
- In the domain management interface, paste the 4 Name servers you just copied
Remove the dot at the end of the NS
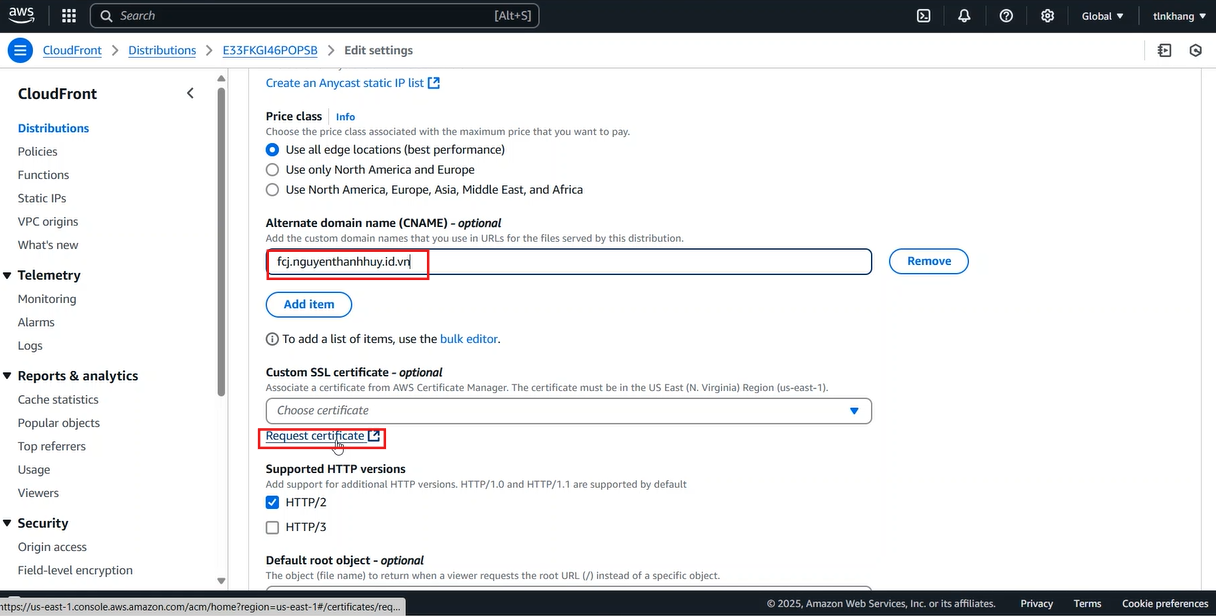
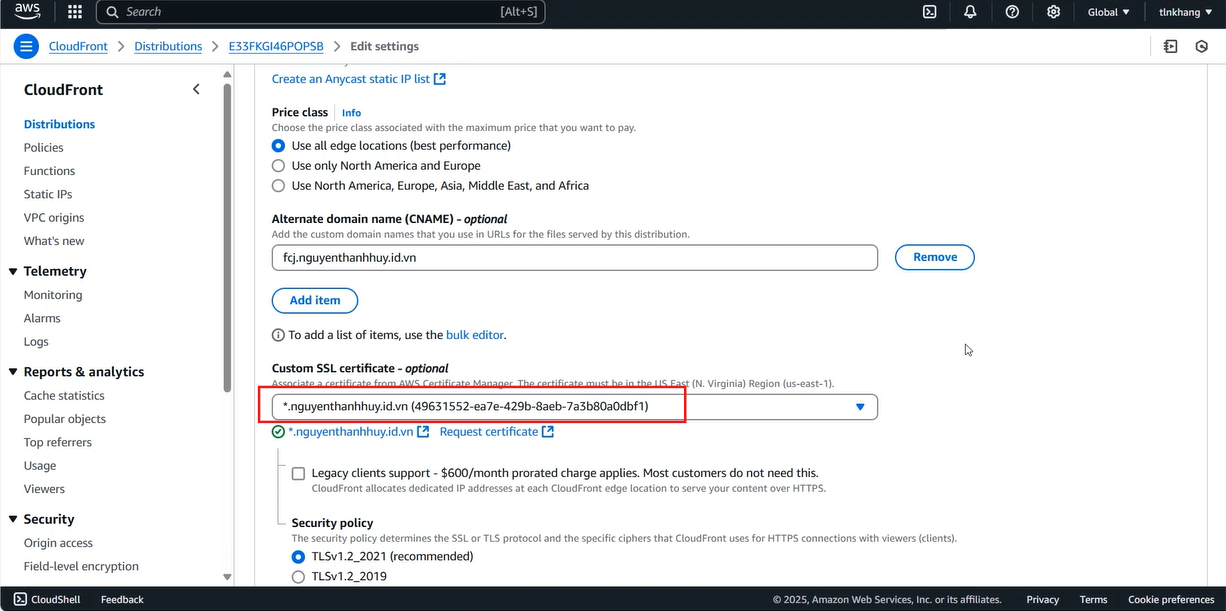
- Go back to the Edit settings section of CloudFront
- In the Alternate domain name (CNAME) field, enter
fcj.nguyenthanhhuy.id.vn
Replace “nguyenthanhhuy.id.vn” with your domain name
- In the SSL Certificate section
- Select Request certificate
- Select Next
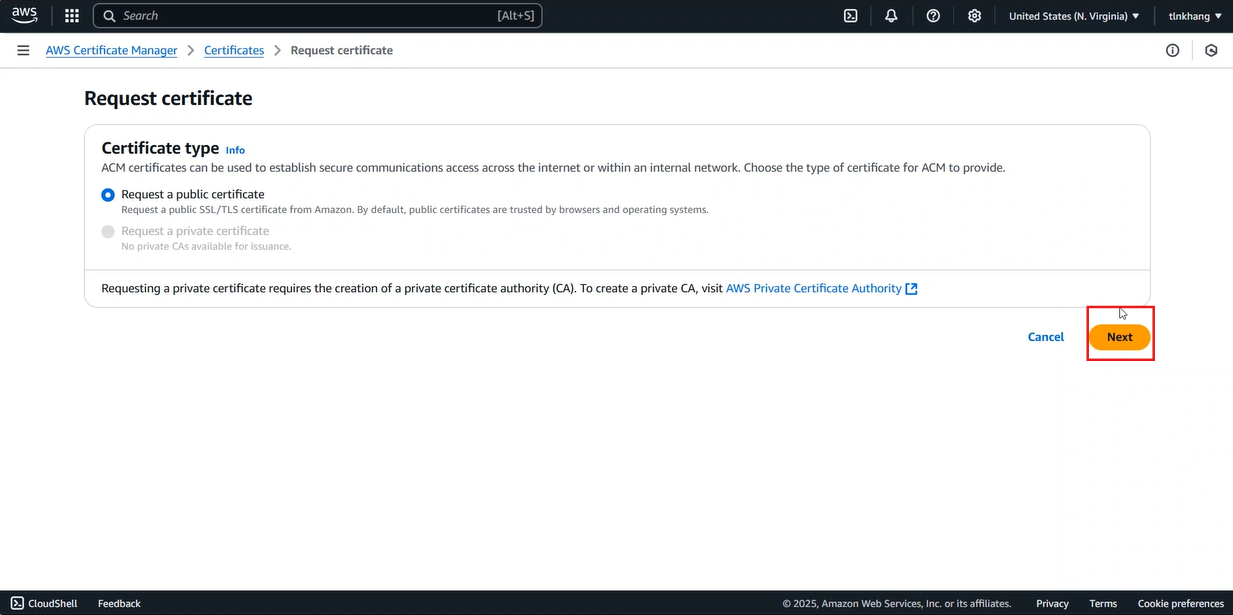
- Create an SSL Certificate in the Request public certificate section
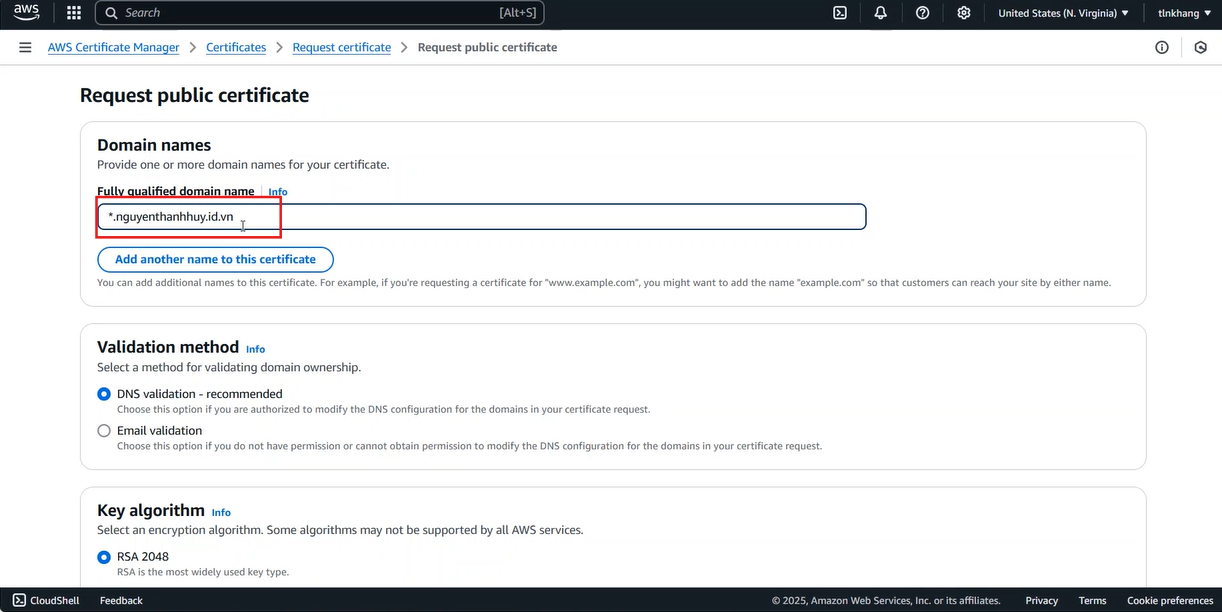
- In the Fully qualified domain name field, enter
*.nguyenthanhhuy.id.vn - Scroll to the bottom of the page, select Request
- Go back to the Edit Settings tab of CloudFront Distributions
- In the Custom SSL Certificate section, select the certificate you just created
- Scroll to the bottom of the page, select Save changes
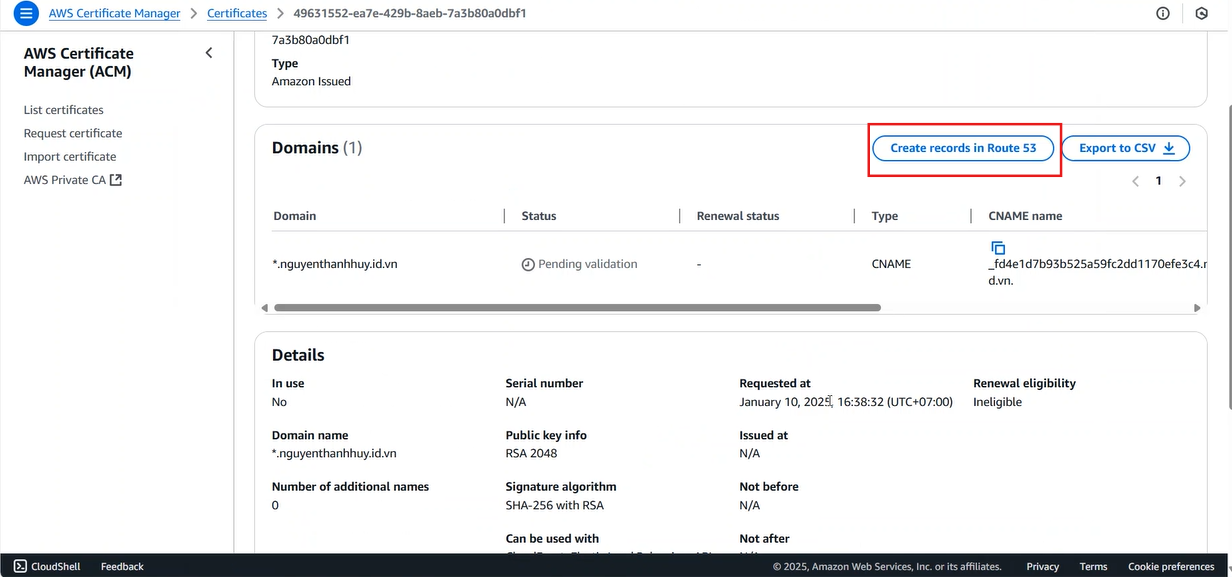
- Access the created certificate
- In the Records section, select Create record in Route 53
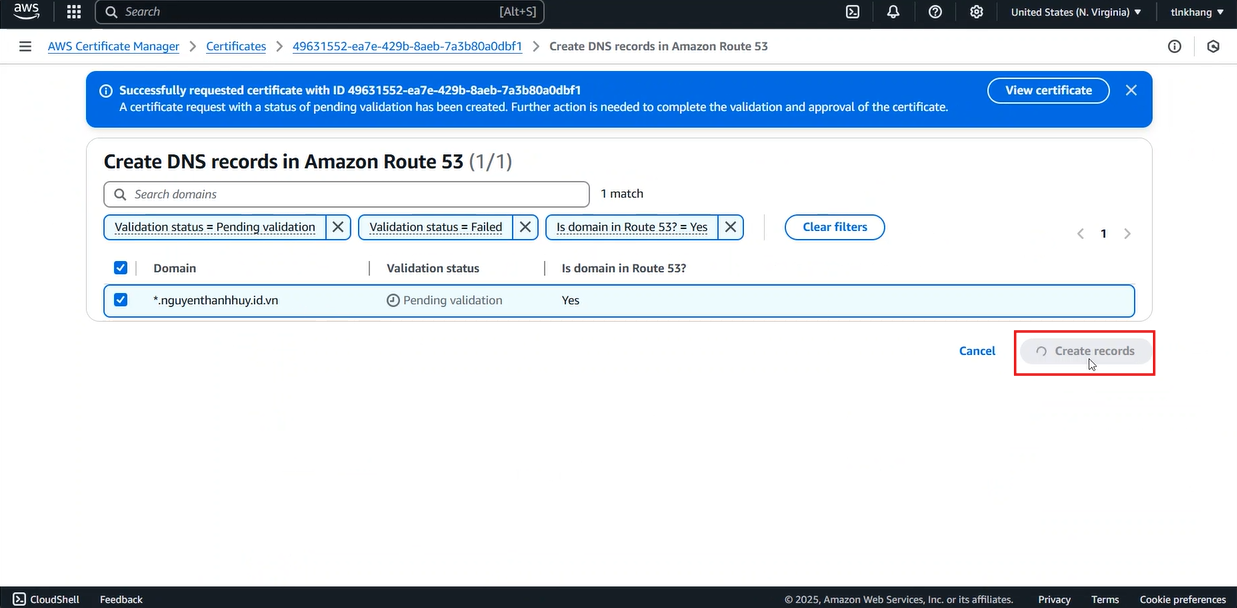
- Select Create records
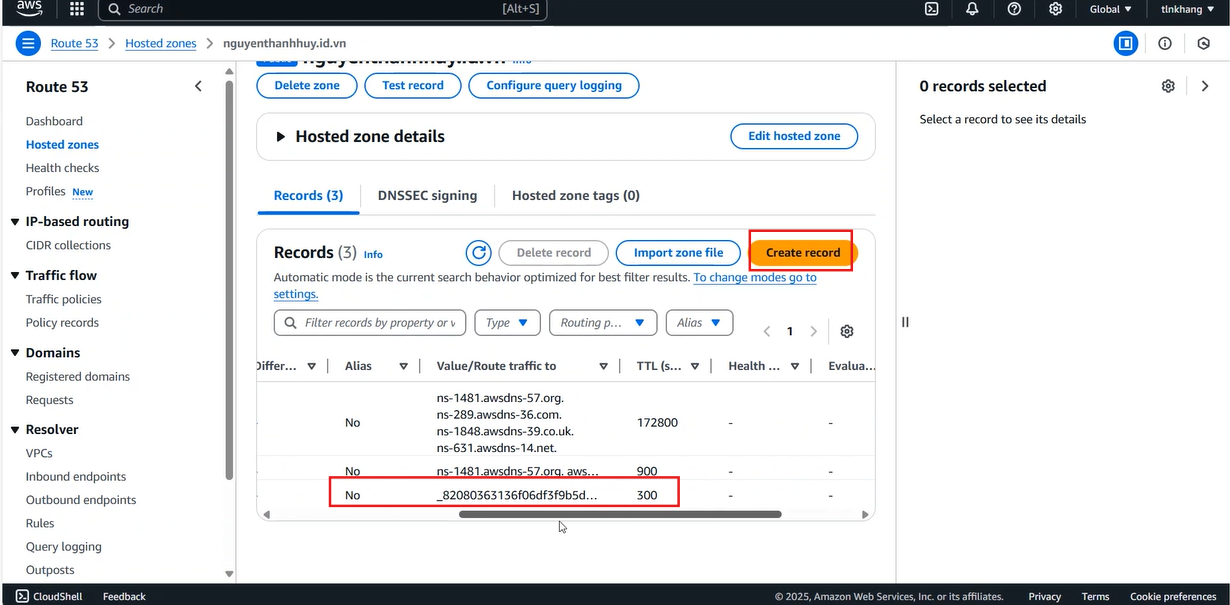
- Go back to Route 53 nguyenthanhhuy.id.vn
- In the Record section, you will see a newly created CNAME
- Select Create Record
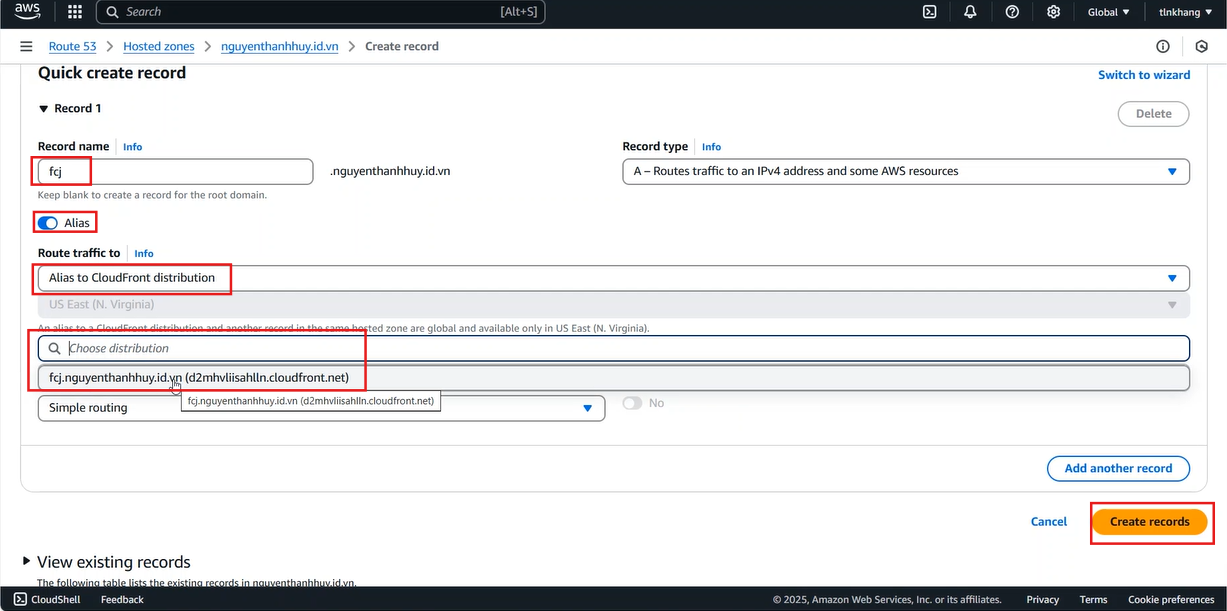
- In the Create record interface
- Enter
fcjin the Record name field - Enable the Alias option
- In the Route traffic to section
- Choose Endpoint select:
Alias to CloudFront distribution - Choose distribution select:
fcj.nguyenthanhhuy.id.vn
- Choose Endpoint select:
- Select Create record
- Check website access
- In the web browser’s search bar, enter
fcj.nguyenthanhhuy.id.vn - Enter
Nhựt Khangin the textbox - Click Submit
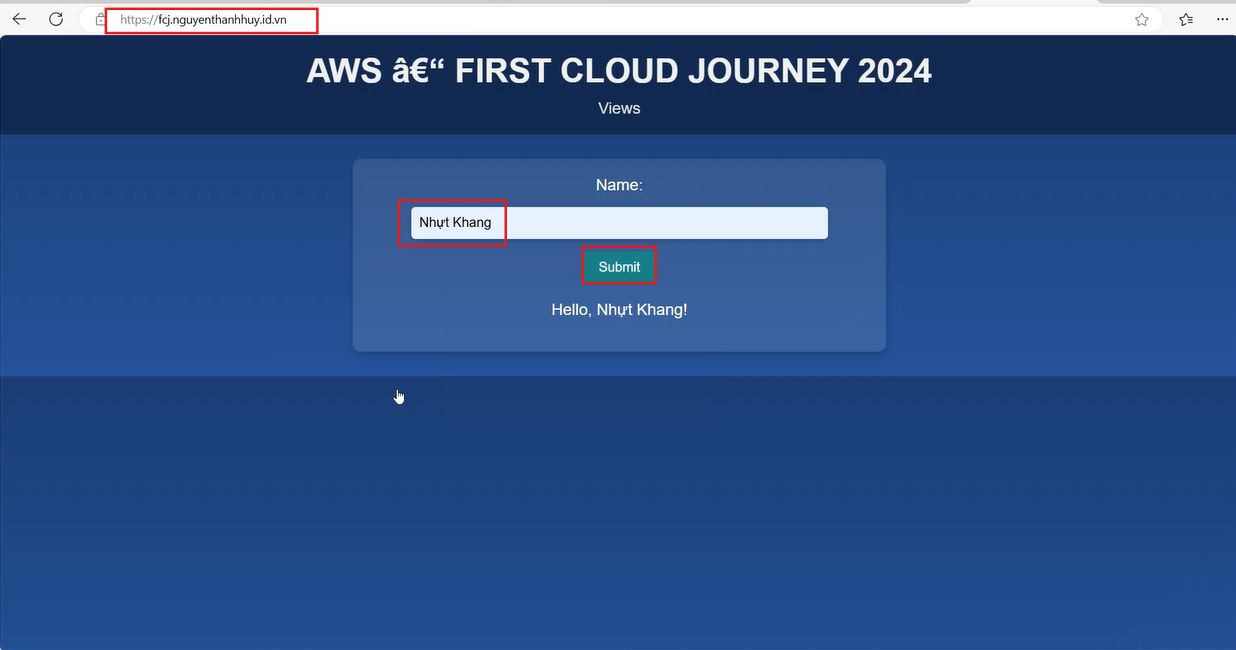
The screen displays the text Hello, Nhựt Khang!